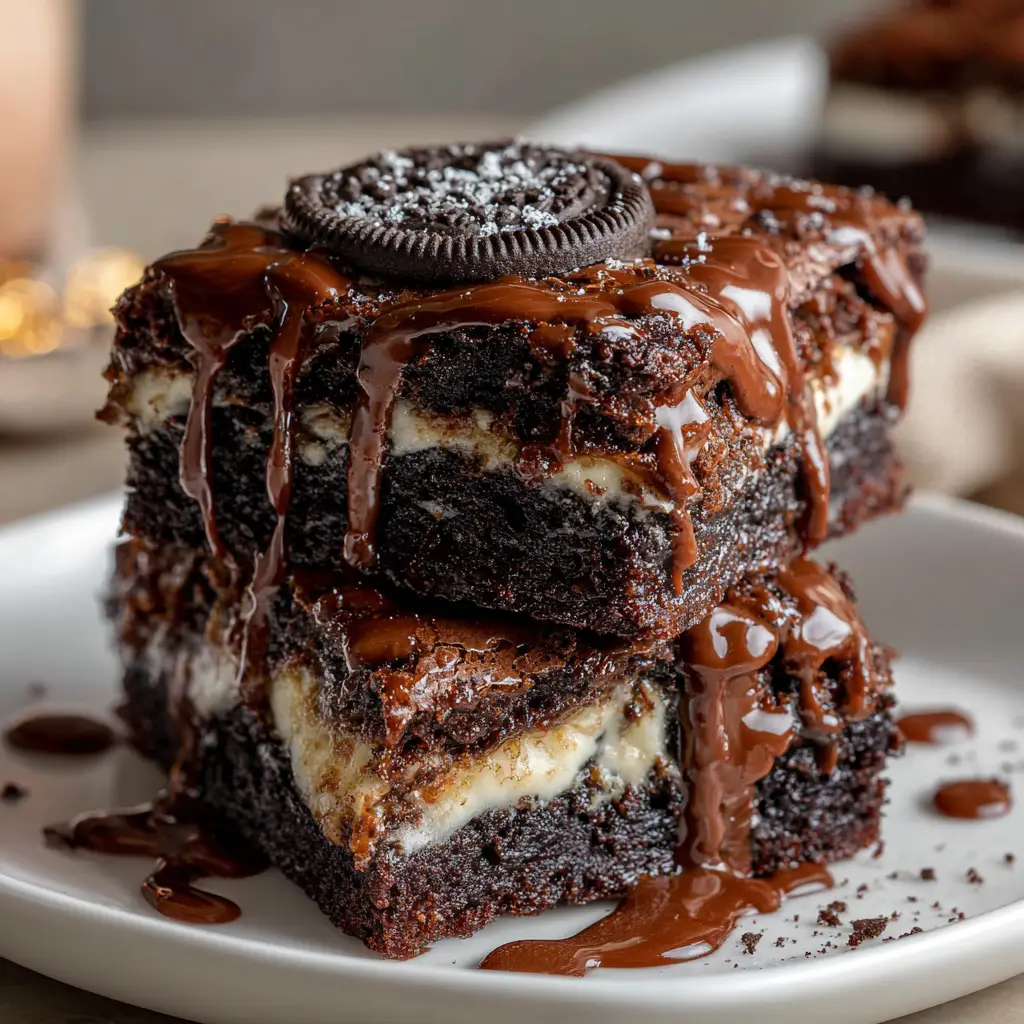
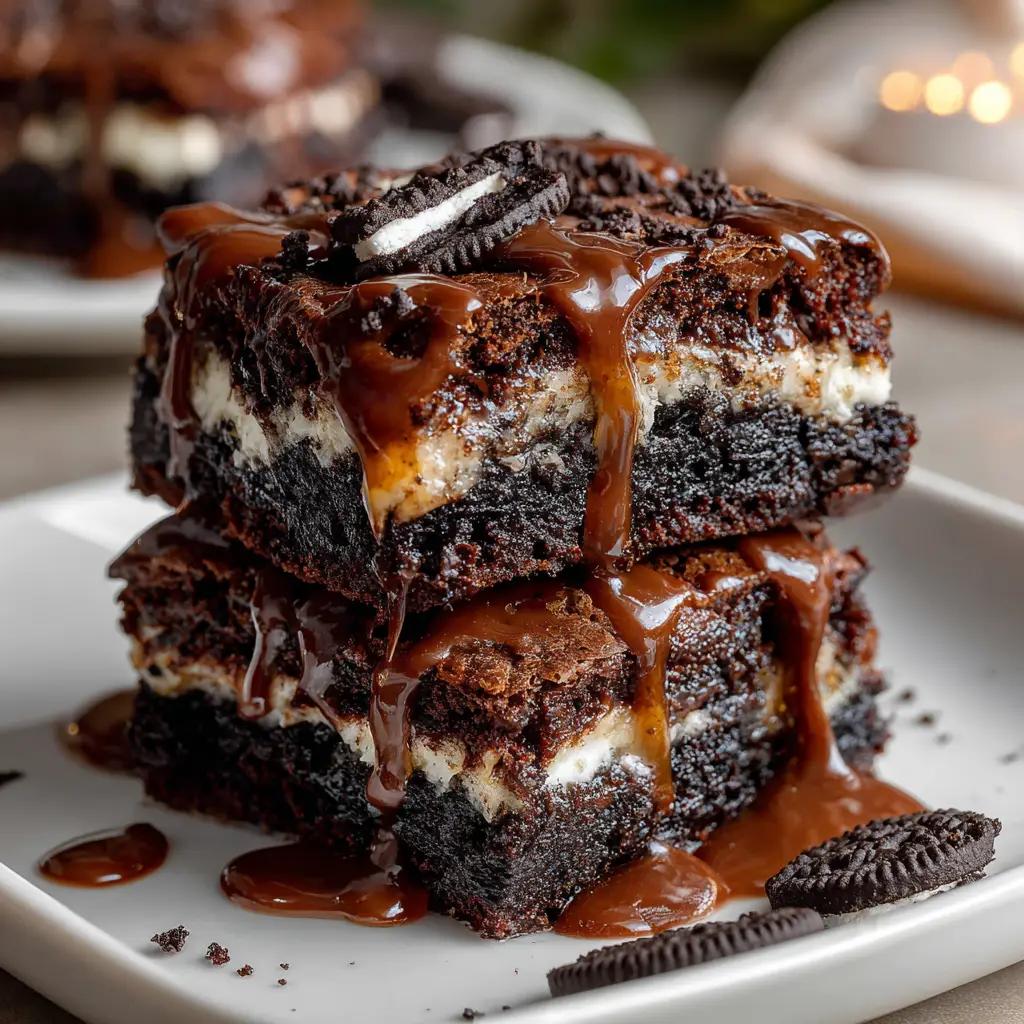
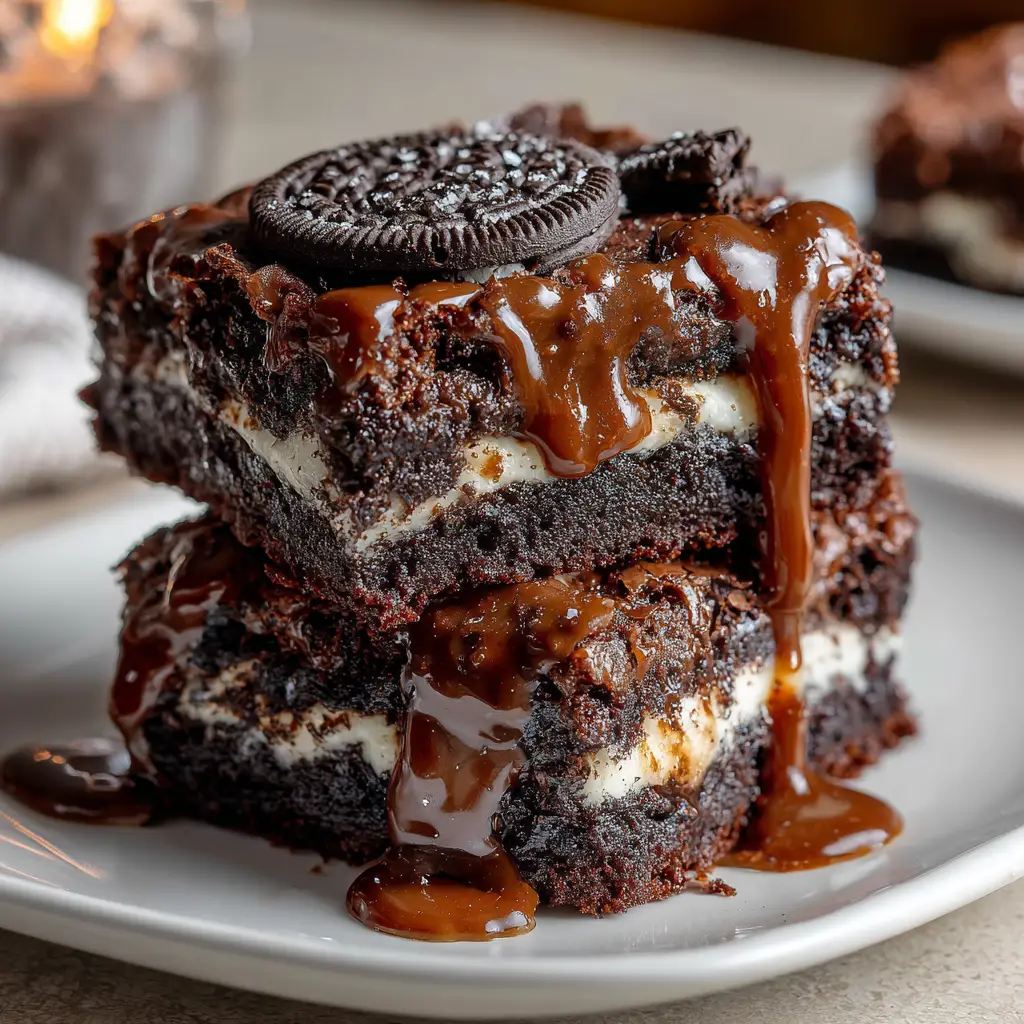
Introduction to Oreo Layered Halloween Brownies
As the leaves turn and the air gets crisp, I find myself craving something sweet and festive. That’s where these Oreo Layered Halloween Brownies come in! They’re not just a treat; they’re a delightful way to celebrate the season with your loved ones. Perfect for busy moms like us, this recipe is quick and easy, making it a go-to for Halloween gatherings or cozy family nights. Imagine rich chocolate brownies layered with creamy Oreo goodness—it’s a dessert that will impress everyone, even the pickiest eaters. Let’s dive into this spooky, delicious adventure!
Why You’ll Love This Oreo Layered Halloween Brownies
These Oreo Layered Halloween Brownies are a dream come true for busy moms and professionals. They come together in just under an hour, making them perfect for last-minute gatherings. The combination of rich chocolate and creamy Oreo filling creates a flavor explosion that will have everyone coming back for seconds. Plus, they’re a hit with kids and adults alike, ensuring smiles all around. What’s not to love?
Ingredients for Oreo Layered Halloween Brownies
Gathering the right ingredients is half the fun of baking! For these Oreo Layered Halloween Brownies, you’ll need a mix of pantry staples and a few special treats. Here’s what you’ll need:
- Brownie mix: The base of our dessert, providing that rich chocolate flavor. You can use any brand you love!
- Large eggs: These help bind everything together, giving the brownies their fudgy texture.
- Vegetable oil: This adds moisture and richness to the brownies. You can substitute with melted butter for a different flavor.
- Water: Just a little to help the brownie mix come together smoothly.
- Oreo cookies: The star of the show! These add a delightful crunch and creamy filling that elevates the brownies.
- Cream cheese: Softened cream cheese creates a luscious layer that pairs perfectly with the chocolate.
- Powdered sugar: This sweetens the cream cheese mixture, making it irresistibly creamy.
- Vanilla extract: A splash of vanilla enhances the flavors, making everything taste even better.
- Whipped topping: This lightens the cream cheese mixture, giving it a fluffy texture.
- Chocolate syrup: For drizzling on top, adding a touch of decadence to your brownies.
For those looking to get creative, consider adding Halloween-themed sprinkles on top for a festive touch! You can find all these ingredients at your local grocery store, and exact quantities are listed at the bottom of the article for easy printing.
How to Make Oreo Layered Halloween Brownies
Step 1: Preheat and Prepare
First things first, let’s get that oven preheating to 350°F (175°C). While it warms up, grab a 9×13 inch baking pan and grease it well. I like to use cooking spray for an easy release, but you can also use butter or parchment paper. This step is crucial to ensure your brownies come out perfectly without sticking. Trust me, no one wants a brownie disaster!
Step 2: Mix the Brownie Batter
In a large mixing bowl, combine the brownie mix, two large eggs, ½ cup of vegetable oil, and ¼ cup of water. Stir everything together until it’s well blended. You want a smooth, thick batter that’s rich and chocolatey. Don’t be afraid to get in there with a spatula or a whisk! This is where the magic begins, and the aroma will start to fill your kitchen.
Step 3: Layer the Brownie Batter
Now, pour half of that luscious brownie batter into your prepared pan. Spread it evenly across the bottom, making sure it reaches all the corners. This layer is the foundation for our Oreo goodness. It’s like laying the first brick in a delicious chocolate castle. Once it’s spread out, you’re ready for the next step!
Step 4: Prepare the Oreo Filling
In another bowl, beat together 8 oz of softened cream cheese, ½ cup of powdered sugar, and 1 tsp of vanilla extract until it’s smooth and creamy. This is where the magic happens! Next, gently fold in 1 cup of whipped topping and about 10 crushed Oreo cookies. The mixture should be fluffy and filled with delightful cookie bits. This creamy layer is going to take your brownies to the next level!
Step 5: Assemble the Layers
Spread the Oreo mixture over the brownie layer in the pan. Make sure it’s even and covers the brownie batter completely. Then, pour the remaining brownie batter on top of the Oreo layer. Spread it out gently, so you don’t disturb the creamy filling underneath. It’s like a delicious surprise waiting to be uncovered!
Step 6: Bake to Perfection
Pop your pan into the preheated oven and bake for 30-35 minutes. Keep an eye on it! You’ll know it’s done when a toothpick inserted in the center comes out clean. If it’s a little gooey, that’s okay; you want them to be fudgy. Just don’t overbake, or you’ll lose that delicious texture!
Step 7: Cool and Serve
Once baked, let the brownies cool completely in the pan. This is the hardest part, but it’s worth the wait! After they’ve cooled, drizzle some chocolate syrup on top for that extra touch of decadence. Cut them into squares, and get ready to enjoy a spooky treat that’s sure to impress!
Tips for Success
- Make sure your cream cheese is softened for easy mixing.
- Don’t skip greasing the pan; it’s key for easy removal.
- Use a toothpick to check for doneness; a few moist crumbs are okay!
- Let the brownies cool completely for cleaner cuts.
- Get creative with toppings—sprinkles or crushed candies add a festive flair!
Equipment Needed
- 9×13 inch baking pan: Essential for baking your brownies. A glass or metal pan works well.
- Mixing bowls: Use a large bowl for the brownie batter and a smaller one for the Oreo filling.
- Whisk or spatula: Perfect for mixing ingredients smoothly.
- Measuring cups: Handy for accurate ingredient measurements.
- Toothpick: For checking the doneness of your brownies.
Variations
- Gluten-Free Option: Use a gluten-free brownie mix to make these brownies suitable for those with gluten sensitivities.
- Nutty Twist: Add chopped nuts like walnuts or pecans to the brownie batter for an extra crunch.
- Minty Fresh: Swap out regular Oreos for mint-flavored Oreos to give your brownies a refreshing twist.
- Vegan Version: Use a vegan brownie mix and substitute eggs with flaxseed meal mixed with water for a plant-based treat.
- Cheesecake Layer: For a richer dessert, add an extra layer of cheesecake by doubling the cream cheese mixture.
Serving Suggestions
- Pair these brownies with a scoop of vanilla ice cream for a delightful contrast.
- Serve with a glass of cold milk or a warm cup of coffee to enhance the chocolate flavor.
- For a festive touch, plate them with Halloween-themed decorations or colorful napkins.
FAQs about Oreo Layered Halloween Brownies
Can I use homemade brownie batter instead of a mix?
Absolutely! If you have a favorite homemade brownie recipe, feel free to use it. Just make sure it’s a thick batter to hold up the Oreo layers.
How do I store leftover brownies?
Store your Oreo Layered Halloween Brownies in an airtight container in the refrigerator. They’ll stay fresh for up to a week, but I doubt they’ll last that long!
Can I freeze these brownies?
Yes! You can freeze the brownies for up to three months. Just wrap them tightly in plastic wrap and then in foil. Thaw them in the fridge before serving.
What can I use instead of cream cheese?
If you’re looking for a lighter option, you can substitute cream cheese with Greek yogurt. It won’t be as rich, but it will still be delicious!
Can I make these brownies ahead of time?
Definitely! These brownies can be made a day in advance. Just store them in the fridge, and they’ll be ready to impress your guests!
Final Thoughts
Making these Oreo Layered Halloween Brownies is more than just baking; it’s about creating sweet memories with family and friends. The joy of watching everyone’s faces light up as they take that first bite is priceless. This recipe is a delightful blend of rich chocolate and creamy Oreo goodness, perfect for any Halloween celebration. Plus, it’s simple enough for even the busiest of moms to whip up. So, gather your loved ones, share some laughs, and enjoy these spooky treats together. Trust me, they’ll become a cherished tradition in your home!
Print
Oreo Layered Halloween Brownies: Spook Your Taste Buds!
- Prep Time: 20 minutes
- Cook Time: 35 minutes
- Total Time: 55 minutes
- Yield: 24 brownies 1x
- Category: Dessert
- Method: Baking
- Cuisine: American
- Diet: Vegetarian
Description
Deliciously spooky Oreo Layered Halloween Brownies that combine rich chocolate brownies with creamy layers of Oreo filling, perfect for Halloween celebrations.
Ingredients
- 1 box brownie mix
- 2 large eggs
- 1/2 cup vegetable oil
- 1/4 cup water
- 1 package Oreo cookies
- 8 oz cream cheese, softened
- 1/2 cup powdered sugar
- 1 tsp vanilla extract
- 1 cup whipped topping
- Chocolate syrup for drizzling
Instructions
- Preheat the oven to 350°F (175°C) and grease a 9×13 inch baking pan.
- In a bowl, mix the brownie mix, eggs, vegetable oil, and water until well combined.
- Pour half of the brownie batter into the prepared pan and spread evenly.
- In another bowl, beat the cream cheese, powdered sugar, and vanilla extract until smooth.
- Fold in the whipped topping and crushed Oreo cookies into the cream cheese mixture.
- Spread the Oreo mixture over the brownie layer in the pan.
- Pour the remaining brownie batter on top of the Oreo layer and spread evenly.
- Bake for 30-35 minutes or until a toothpick inserted comes out clean.
- Let cool completely before cutting into squares.
- Drizzle with chocolate syrup before serving.
Notes
- For a more festive look, add Halloween-themed sprinkles on top.
- Store leftovers in an airtight container in the refrigerator.
- These brownies can be made a day in advance for easier party prep.
Nutrition
- Serving Size: 1 brownie
- Calories: 250
- Sugar: 20g
- Sodium: 150mg
- Fat: 12g
- Saturated Fat: 6g
- Unsaturated Fat: 4g
- Trans Fat: 0g
- Carbohydrates: 32g
- Fiber: 1g
- Protein: 3g
- Cholesterol: 30mg