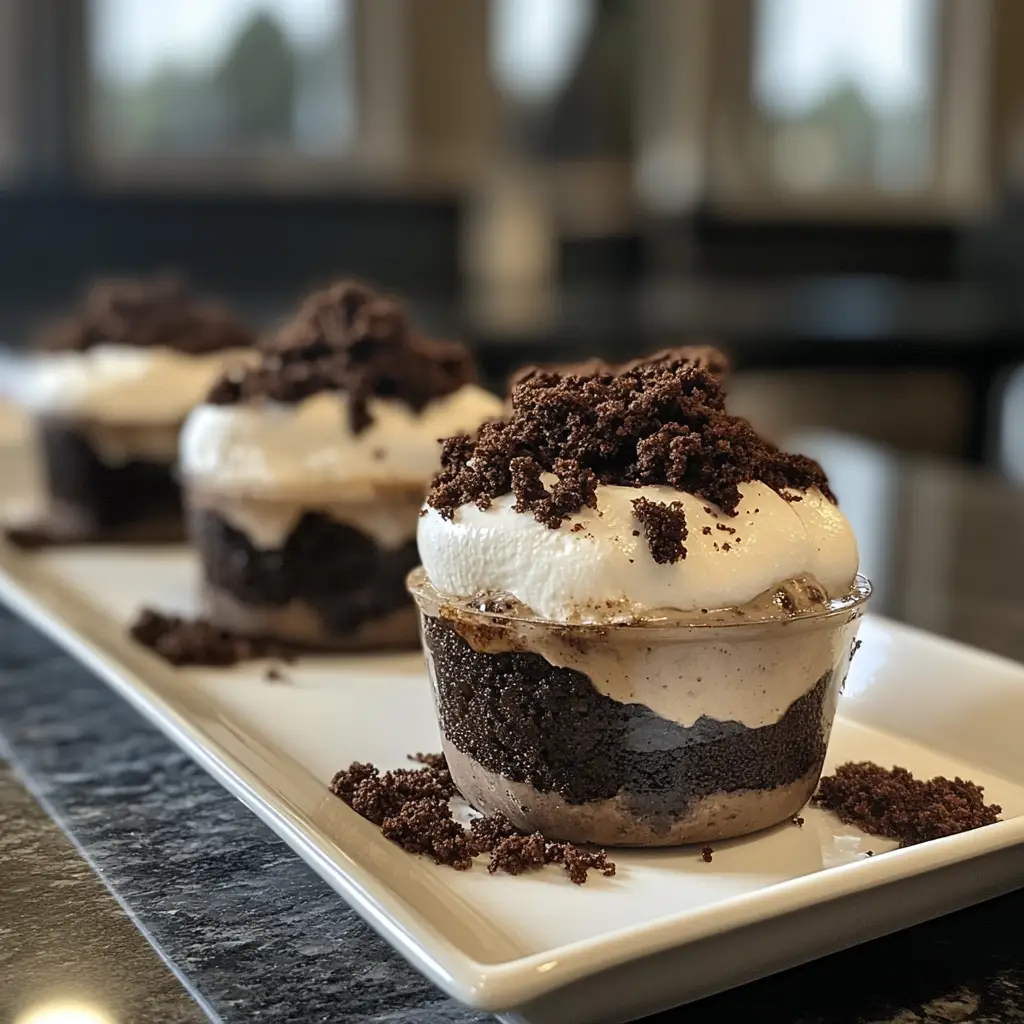
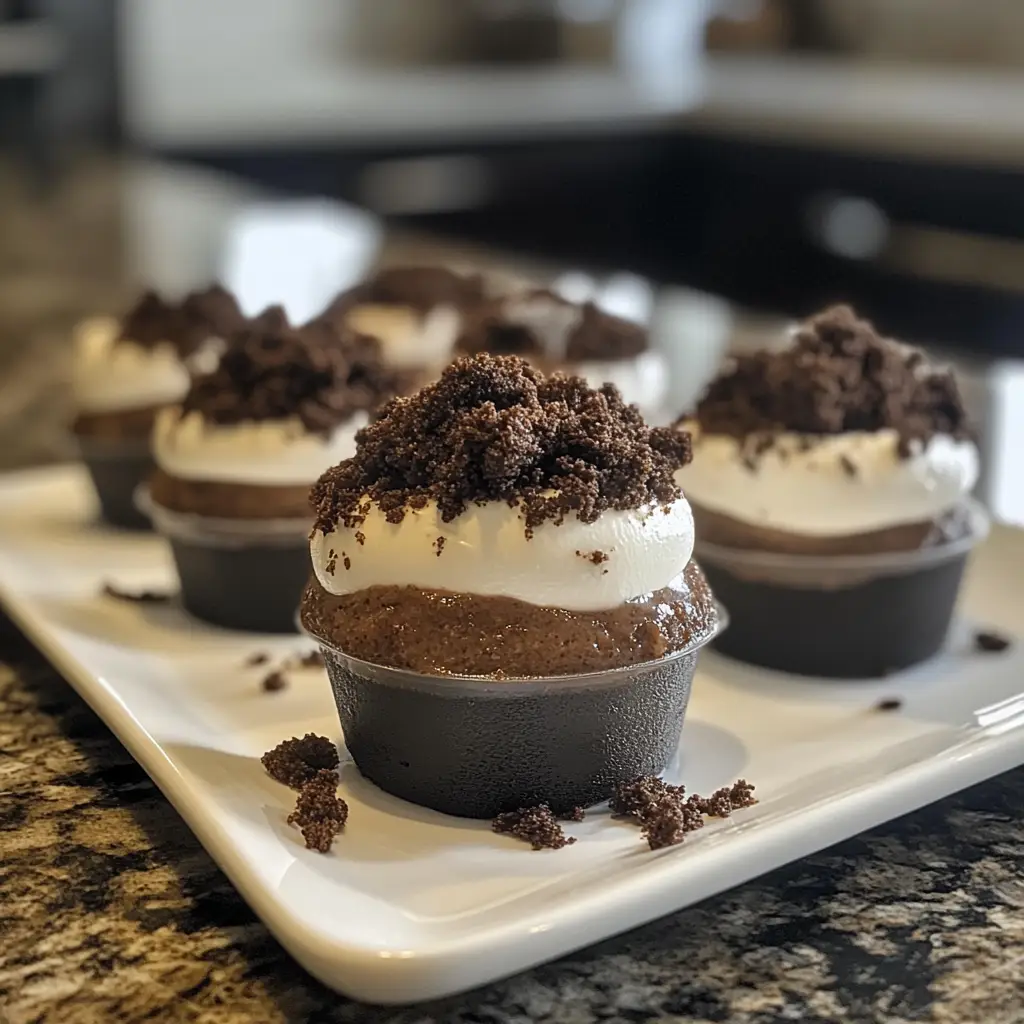
Introduction to Graveyard Dirt Pudding Cups
As a busy mom, I know how challenging it can be to whip up something fun and delicious, especially during the hectic Halloween season. That’s why I absolutely adore these Graveyard Dirt Pudding Cups! They’re not just a treat; they’re a delightful way to bring a little spooky fun to your table without spending hours in the kitchen. With layers of creamy chocolate pudding, crushed cookies, and gummy worms, these cups are sure to impress your loved ones. Plus, they’re a quick solution for a busy day, making them perfect for any themed party!
Why You’ll Love This Graveyard Dirt Pudding Cups
These Graveyard Dirt Pudding Cups are a breeze to make, which is a lifesaver for busy moms like me! With just a few simple steps, you can create a dessert that looks as good as it tastes. The rich chocolate flavor combined with the crunch of cookies is simply irresistible. Plus, they’re a hit with kids and adults alike, making them the perfect treat for any gathering!
Ingredients for Graveyard Dirt Pudding Cups
Gathering the right ingredients is half the fun! Here’s what you’ll need to create these spooky delights:
- Chocolate instant pudding mix: This is the star of the show, providing that rich, chocolatey flavor we all crave.
- Milk: Essential for mixing with the pudding mix, it helps create that smooth, creamy texture.
- Cream cheese: Softened cream cheese adds a delightful richness to the dessert, balancing the sweetness perfectly.
- Powdered sugar: This sweetener gives the cream cheese mixture a lovely sweetness without the graininess of granulated sugar.
- Whipped topping: Light and fluffy, it makes the cream cheese mixture airy and adds a nice volume to the layers.
- Chocolate sandwich cookies: Crushed to create the “dirt” layer, these cookies add a crunchy texture and a chocolatey taste.
- Gummy worms: The perfect creepy-crawly decoration that brings the graveyard theme to life!
Feel free to get creative! For a more intense chocolate flavor, consider using dark chocolate pudding mix. You can also add other spooky decorations like candy eyes or edible glitter for an extra festive touch. If you’re short on time, these can be made a day in advance, making them a convenient option for busy schedules. Exact quantities for each ingredient are available at the bottom of the article for easy printing!
How to Make Graveyard Dirt Pudding Cups
Now that we have our ingredients ready, let’s dive into the fun part—making these Graveyard Dirt Pudding Cups! Follow these simple steps, and you’ll have a spooky dessert that’s sure to impress.
Step 1: Prepare the Chocolate Pudding
Start by whisking together the chocolate pudding mix and milk in a mixing bowl. I like to use a whisk for this; it helps to get rid of any lumps. Keep whisking until the mixture is smooth and creamy. Once it’s well combined, let it sit for about 5 minutes. This allows the pudding to thicken up nicely, creating that luscious texture we all love.
Step 2: Make the Cream Cheese Mixture
In another bowl, beat the softened cream cheese and powdered sugar together. I usually use an electric mixer for this step, as it makes the process quicker and easier. Beat until the mixture is creamy and smooth. This step is crucial because it adds a rich flavor to our dessert, balancing the sweetness of the pudding.
Step 3: Combine with Whipped Topping
Now, it’s time to fold in the whipped topping into the cream cheese mixture. Gently mix it in until everything is well combined. Be careful not to overmix; we want to keep that light and airy texture. This fluffy mixture will be a delightful layer in our pudding cups!
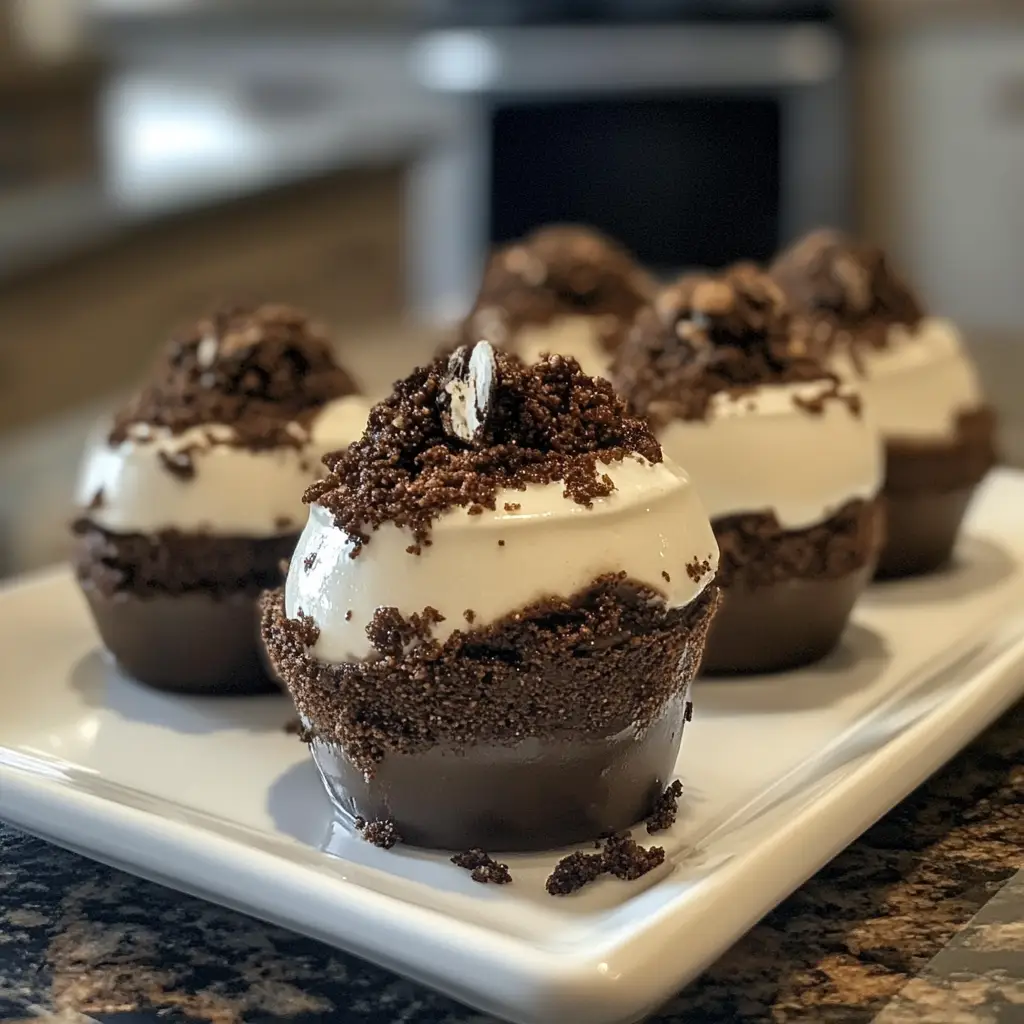
Step 4: Layer the Ingredients
Grab your clear cups and start layering! Begin with a layer of chocolate pudding at the bottom. Then, sprinkle a layer of crushed chocolate sandwich cookies on top. Follow this with a layer of the cream cheese mixture. Repeat these layers until the cups are filled, finishing with a generous layer of crushed cookies on top. The layers create a beautiful visual effect, making it look like a spooky graveyard!
Step 5: Finish and Chill
To complete your Graveyard Dirt Pudding Cups, decorate the top with gummy worms. They add that perfect creepy touch! Once you’ve finished decorating, place the cups in the refrigerator. Let them chill for at least 1 hour before serving. This chilling time allows the flavors to meld together beautifully, making each bite even more delicious.
Tips for Success
- Make sure your cream cheese is softened for easy mixing.
- Use a whisk for the pudding to avoid lumps and achieve a smooth texture.
- Chill the cups for at least an hour to enhance the flavors.
- Get creative with decorations—candy eyes or edible glitter can add extra fun!
- Prepare these cups a day in advance for a stress-free serving experience.
Equipment Needed
- Mixing bowls: Any size will do, but a medium bowl is perfect for the pudding.
- Whisk: A hand whisk works great, but an electric mixer can save time.
- Clear cups: Use any clear cups or small jars to showcase those spooky layers.
- Spatula: A rubber spatula is ideal for folding in the whipped topping.
Variations
- For a gluten-free option, use gluten-free chocolate sandwich cookies to create the “dirt” layer.
- Try adding a layer of crushed nuts or granola for an extra crunch and flavor contrast.
- Swap out the chocolate pudding for vanilla pudding for a different taste experience.
- Incorporate pumpkin puree into the cream cheese mixture for a seasonal twist.
- For a dairy-free version, use coconut cream and dairy-free pudding mix.
Serving Suggestions
- Pair these Graveyard Dirt Pudding Cups with spooky-themed cookies for a fun dessert table.
- Serve alongside a refreshing apple cider or a Halloween punch for a festive drink option.
- For presentation, place the cups on a tray decorated with faux cobwebs and plastic spiders.
- Consider adding a small sign that says “Graveyard Delights” for an extra touch!
FAQs about Graveyard Dirt Pudding Cups
As I’ve shared my love for these Graveyard Dirt Pudding Cups, I often get questions from fellow busy moms and dessert enthusiasts. Here are some of the most common queries I’ve encountered:
Can I make Graveyard Dirt Pudding Cups in advance?
Absolutely! These cups can be made a day ahead. Just keep them covered in the fridge until you’re ready to serve. This makes them a perfect option for busy schedules!
What can I use instead of chocolate sandwich cookies?
If you want to switch things up, consider using crushed graham crackers or even vanilla wafers. They’ll still give you that fun “dirt” effect!
How can I make these cups healthier?
For a healthier twist, you can use low-fat cream cheese and sugar-free pudding mix. You can also add fresh fruit layers for a nutritious boost!
Can I use a different flavor of pudding?
Definitely! While chocolate is a classic, vanilla or even butterscotch pudding can create a unique flavor profile. Just remember to adjust your toppings accordingly!
What’s the best way to store leftovers?
Store any leftovers in an airtight container in the fridge. They should stay fresh for up to three days, but I doubt they’ll last that long!
Final Thoughts
Creating these Graveyard Dirt Pudding Cups is more than just making a dessert; it’s about bringing joy and laughter to the table. I love how this recipe transforms simple ingredients into a spooky delight that sparks excitement in both kids and adults. The smiles on my family’s faces when they dig into these layered treats are priceless. Plus, the ease of preparation means I can focus on what truly matters—making memories with my loved ones. So, whether it’s Halloween or just a fun family night, these pudding cups are sure to be a hit!
Print
Graveyard Dirt Pudding Cups: A Spooky Delight Awaits!
- Prep Time: 20 minutes
- Cook Time: 0 minutes
- Total Time: 1 hour 20 minutes
- Yield: 6 servings 1x
- Category: Dessert
- Method: No-bake
- Cuisine: American
- Diet: Vegetarian
Description
Graveyard Dirt Pudding Cups are a fun and spooky dessert perfect for Halloween or any themed party. These cups are layered with chocolate pudding, crushed cookies, and topped with gummy worms for a creepy effect.
Ingredients
- 1 package (3.9 oz) chocolate instant pudding mix
- 2 cups milk
- 1 package (8 oz) cream cheese, softened
- 1 cup powdered sugar
- 1 container (8 oz) whipped topping
- 1 package (15 oz) chocolate sandwich cookies, crushed
- Gummy worms for decoration
Instructions
- In a mixing bowl, whisk together the chocolate pudding mix and milk until smooth. Let it sit for 5 minutes to thicken.
- In another bowl, beat the softened cream cheese and powdered sugar until creamy.
- Fold in the whipped topping into the cream cheese mixture until well combined.
- In clear cups, layer the chocolate pudding, followed by a layer of crushed cookies, and then the cream cheese mixture.
- Repeat the layers until the cups are filled, finishing with a layer of crushed cookies on top.
- Decorate with gummy worms on top of the crushed cookies.
- Chill in the refrigerator for at least 1 hour before serving.
Notes
- For a more intense chocolate flavor, use dark chocolate pudding mix.
- Feel free to add other spooky decorations like candy eyes or edible glitter.
- These can be made a day in advance for convenience.
Nutrition
- Serving Size: 1 cup
- Calories: 350
- Sugar: 25g
- Sodium: 200mg
- Fat: 15g
- Saturated Fat: 8g
- Unsaturated Fat: 5g
- Trans Fat: 0g
- Carbohydrates: 45g
- Fiber: 2g
- Protein: 5g
- Cholesterol: 30mg